
[CODE MUSIC BOT FOR DISCORD] - Phần 3: Lập trình các tính năng
![[CODE MUSIC BOT FOR DISCORD] - Phần 3: Lập trình các tính năng](/assets/images/posts/2022-05-06-discord-music-bot-3/banner.jpg)
Summary
HideỞ Phần 2, UCC đã cùng các bạn đăng ký tài khoản Bot với Discord và đăng nhập vào nó bằng Javascript. Trong bài viết này, mình sẽ hướng dẫn các bạn lập trình đầy đủ các tính năng để con Bot của chúng ta chạy được nhạc nhé!
Cấu trúc hoạt động của Bot
Con Bot của chúng ta sẽ có những lệnh cơ bản của một Bot chơi nhạc:
- play: Chơi một bài nhạc
- pause: Tạm dừng nhạc
- resume: Tiếp tục chơi nhạc
- back: Quay về bài trước
- skip: Bỏ qua bài nhạc đang chơi
- nowplaying: Thông tin về bài nhạc đang được chơi
- queue: Danh sách các bài nhạc đã được đăng ký
- stop: Dừng chơi nhạc
Với rất nhiều lệnh như vậy, chúng ta cần một “trung tâm điều khiển” để có thể xử lý. Mình sẽ gọi file này là handler.js. Nhiệm vụ của file này là phát hiện khi người dùng muốn ra lệnh nào đó cho Bot, sau đó xử lý tin nhắn họ gửi đến rồi chạy lệnh tương ứng. Con Bot của chúng ta sẽ hoạt động theo mô hình như sau:
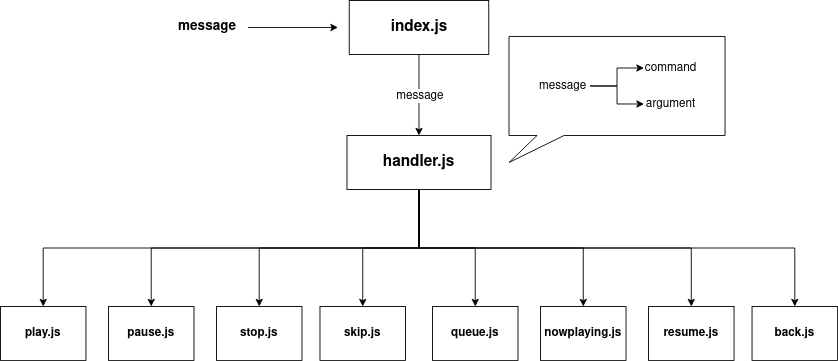
Object message được Discord trả về khi kích hoạt event “messageCreate” sẽ được truyền vào file handler.js. Tại đây, chúng ta sẽ phân biệt xem tin nhắn được gửi đến có phải một lệnh hợp lệ hay không, sau đó chuyển tách tên lệnh và argument rồi truyền xuống file tính năng tương ứng để xử lý. Ví dụ cho dễ hiểu, giả sử bạn gửi một tin nhắn có nội dung “!play Lâu đài tình ái”, handler.js sẽ nhận ra tin nhắn này bắt đầu bằng dấu “!” (PREFIX) báo hiệu cho bot chuẩn bị xử lý, sau đó file này sẽ tách tin nhắn ra làm hai phần: phần command là “play” và phần argument là “Lâu đài tình ái”, rồi nó sẽ truyền argument này vào file play.js.
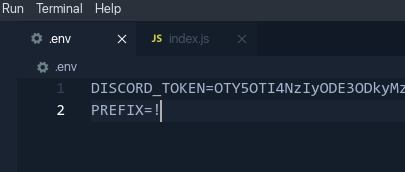
Do vậy PREFIX khá quan trọng. Nó giúp con Bot của chúng ta phân biệt những tin nhắn cần xử lý và những tin nhắn nào không. Các bạn hãy thêm một dòng khai báo PREFIX vào file .env nhé. Ở đây mình dùng dấu chấm than !, các bạn có thể sử dụng dấu gì cũng được:
handlers.js
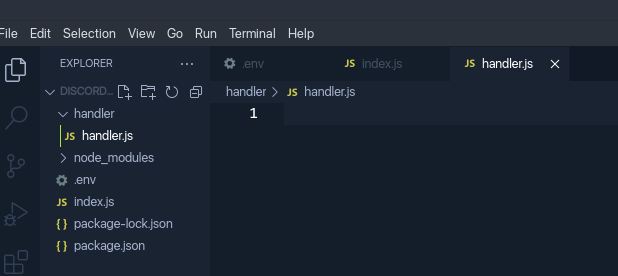
Như đã đề cập, file này sẽ xử lý tin nhắn đầu vào từ người dùng gửi đến server. Các bạn hãy tạo một folder là handler và cho vào đó một file handler.js nhé:
Ở đây chúng ta sẽ cần đến biến PREFIX ở file .env, nên các bạn hãy khai báo sử dụng module dotenv nhé:
1
require('dotenv').config();
Vì chúng ta sẽ cần sử dụng file handler.js này ở index.js, nên các bạn hãy sử dụng module.exports để xuất hàm xử lý ra ngoài:
1
2
3
4
5
module.exports = {
    async handle(client, message, player) {

    }
}
Chúng ta sẽ xuất ra ngoài hàm handle() chứa các tham số bao gồm object client, message và player.
Okay. Việc đầu tiên chúng ta cần làm là kiểm tra xem tin nhắn của người gửi có bắt đầu bằng PREFIX hay không. Bên cạnh đó ta cũng không muốn xử lý những tin nhắn mà chính con Bot của mình gửi đến server:
1
2
3
4
const raw_message = message.content;
if (!raw_message.startsWith(process.env.PREFIX) || message.author.bot) {
    return;
}
Nếu tin nhắn được gửi đến vừa bắt đầu với PREFIX lại vừa không phải từ Bot, chúng ta sẽ xử lý tiếp. Bước tiếp theo ta sẽ tách tên command và argument.
Vì phần command và argument được phân cách nhau bởi dấu cách, chúng ta có thể sử dụng hàm split(” “) , sau đó lược bỏ phần PREFIX đi:
1
const command = raw_message.split(" ")[0].substring(process.env.PREFIX.length);
Phần còn lại của tin nhắn sẽ là argument. Chúng ta sẽ muốn nó là một string duy nhất nên sẽ sử dụng hàm join():
1
const args = raw_message.split(" ").slice(1).join(" ");
Chúng ta thêm hai dòng để kiểm tra xem command và argument đã được tách thành công chưa nhé:
1
2
console.log("Command: " + command);
console.log("Argument: " + args);
1
2
3
4
5
6
7
8
9
10
11
12
13
14
15
16
require('dotenv').config();

module.exports = {
    async handle(client, message, player) {
        const raw_message = message.content;
        if (!raw_message.startsWith(process.env.PREFIX) || message.author.bot) {
            return;
        }

        const command = raw_message.split(" ")[0].substring(process.env.PREFIX.length);
        const args = raw_message.split(" ").slice(1).join(" ");

        console.log("Command: " + command);
        console.log("Argument: " + args);
    }
}
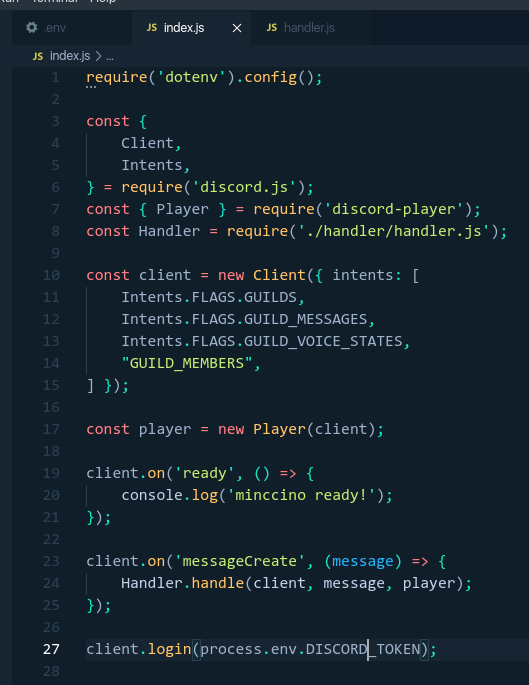
Trước tiên chúng ta cần kết nối file handler.js này với index.js đã. Ở index.js, chúng ta cần nạp file handler.js vào một biến:
1
const Handler = require('./handler/handler.js');
Ở hàm xử lý event “messageCreate”, chúng ta sẽ truyền object message vào Handler:
1
2
3
client.on('messageCreate', (message) => {
    Handler.handle(client, message, player);
});
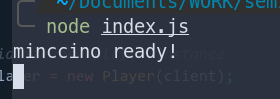
Sau đó chúng ta bấm chạy index.js thôi:
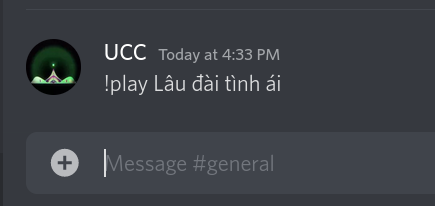
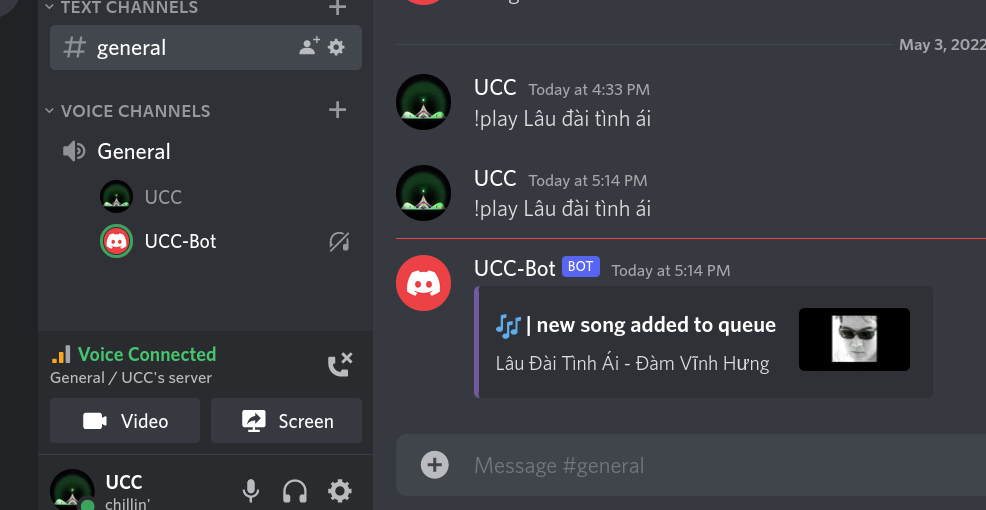
Bây giờ hãy gửi thử tin nhắn “!play Lâu đài tình ái” lên server:
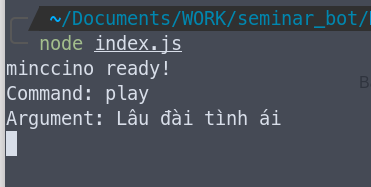
Tuỵt! Vậy là command và argument đã đươc tách thành công.
play.js
Chúng ta đã hoàn thành chức năng đầu tiên của file handler.js. Việc tiếp theo là truyền argument vào các file chức năng tương ứng. Đầu tiên chúng ta sẽ lập trình file play.js có chức năng nhảy vào kênh voice của người dùng và chơi bài nhạc được yêu cầu, nếu Bot đang chơi một bài rồi, nó sẽ cho bài mới yêu cầu vào queue.
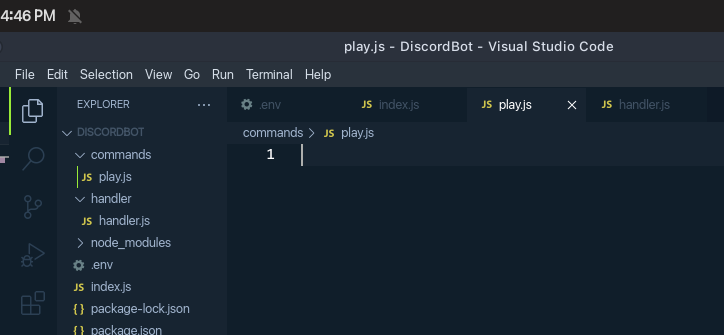
Đầu tiên bạn hãy tạo một folder commands để lưu các file lệnh, sau đó tạo file play.js ở trong đó nhé:
Đầu tiên khai báo một số module sẽ sử dụng:
1
2
const { MessageEmbed } = require('discord.js');
const { QueryType } = require('discord-player');
Chúng ta sẽ lại sử dụng module.exports để xuất hàm xử lý ra ngoài:
1
2
3
4
5
6
7
8
module.exports = {
    name: 'play',
    description: 'play a song',

    async execute(message, client, player, args){

    }
}
Chúng ta sẽ lấy thông tin về server và tác giả tin nhắn:
1
2
const guild = await client.guilds.fetch(message.guildId);
const author = await guild.members.fetch(message.author.id);
Ta kiểm tra xem tác giả có ở trong kênh voice nào không:
1
2
3
4
if (author.voice.channelId == null) {
    message.channel.send('you are not in a voice channel.');
    return;
}
Tạo một queue mới:
1
2
3
4
5
const queue = player.createQueue(message.guildId, {
    metadata: {
        channel: message
    }
});
Sau đó ta cho bot kết nối vào kênh voice, nếu có vấn đề gì sẽ báo lỗi:
1
2
3
4
5
6
7
8
9
try {
    if (!queue.connection) await queue.connect(author.voice.channelId);
} catch {
    queue.destroy();
    return await message.channel.send({
        content: 'could not join your voice channel!',
        ephemeral: true,
    });
}
Nếu kết nối thành công, chúng ta sẽ tạo một track mới:
1
2
3
4
5
6
7
8
9
10
const track = await player.search(args, {
    requestedBy: message.author.username,
    searchEngine: QueryType.AUTO,
});

if (!track || !track.tracks.length)
    return await message.channel.send({
        content: `no video/song/playlist was found while searching for: ${track}`,
        ephemeral: true,
    });
Đoạn code trên sẽ tìm kiếm bài nhạc theo tên đã nhập. Ta khởi tạo một tin nhắn Discord Embed để thông tin về bài nhạc vừa tìm được:
1
2
3
4
5
6
7
8
9
10
11
12
const playEmbed = new MessageEmbed()
    .setColor(`RANDOM`)
    .setTitle(
        `🎶 | new ${track.playlist ? 'playlist' : 'song'} added to queue`
    );

// create embed with thumbnail and description for single tracks
if (!track.playlist) {
    const tr = track.tracks[0]
    playEmbed.setThumbnail(tr.thumbnail);
    playEmbed.setDescription(`${tr.title}`);
}
Xong xuôi rồi chúng ta sẽ cho con Bot bật bài nhạc này lên, nếu có một bài nào đó đang được bật thì bot sẽ cho bài mới vào queue:
1
2
3
4
5
6
7
8
9
10
11
if (!queue.playing) {
    track.playlist
        ? queue.addTracks(track.tracks)
        : queue.play(track.tracks[0]);
    return await message.channel.send({ embeds: [playEmbed] });
} else if (queue.playing) {
    track.playlist
        ? queue.addTracks(track.tracks)
        : queue.addTrack(track.tracks[0]);
    return await message.channel.send({ embeds: [playEmbed] });
}
Oke, vậy là chúng ta đã lập trình xong file play.js rồi đấy:
1
2
3
4
5
6
7
8
9
10
11
12
13
14
15
16
17
18
19
20
21
22
23
24
25
26
27
28
29
30
31
32
33
34
35
36
37
38
39
40
41
42
43
44
45
46
47
48
49
50
51
52
53
54
55
56
57
58
59
60
61
62
63
64
65
66
67
68
69
70
71
72
73
74
75
76
77
78
79
// necessary classes
const { MessageEmbed } = require('discord.js');
const { QueryType } = require('discord-player');

module.exports = {
    name: 'play',
    description: 'play a song.',

    async execute(message, client, player, args) {
        // get ids of server and person the message was sent from
        const guild = await client.guilds.fetch(message.guildId);
        const author = await guild.members.fetch(message.author.id);

        if (author.voice.channelId == null) {
            message.channel.send('you are not in a voice channel.');
            return;
        }

        // create a queue for given server
        const queue = player.createQueue(message.guildId, {
            metadata: {
                channel: message
            }
        });

        // check for voice channel connection
        try {
            if (!queue.connection) await queue.connect(author.voice.channelId);
        } catch {
            queue.destroy();
            return await message.channel.send({
                content: 'could not join your voice channel!',
                ephemeral: true,
            });
        }

        // search for track with given query
        const track = await player.search(args, {
            requestedBy: message.author.username,
            searchEngine: QueryType.AUTO,
        });

        if (!track || !track.tracks.length)
            return await message.channel.send({
                content: `no video/song/playlist was found while searching for: ${track}`,
                ephemeral: true,
            });

        // create embed message
        const playEmbed = new MessageEmbed()
            .setColor(`RANDOM`)
            .setTitle(
                `🎶 | new ${track.playlist ? 'playlist' : 'song'} added to queue`
            );

        // create embed with thumbnail and description for single tracks
        if (!track.playlist) {
            const tr = track.tracks[0]
            playEmbed.setThumbnail(tr.thumbnail);
            playEmbed.setDescription(`${tr.title}`);
        }

        // if queue isn't playing, add tracks to queue and play them
        // if queue is playing, add tracks to queue
        if (!queue.playing) {
            track.playlist
                ? queue.addTracks(track.tracks)
                : queue.play(track.tracks[0]);
            return await message.channel.send({ embeds: [playEmbed] });
        } else if (queue.playing) {
            track.playlist
                ? queue.addTracks(track.tracks)
                : queue.addTrack(track.tracks[0]);
            return await message.channel.send({ embeds: [playEmbed] });
        }

        console.log(queue.tracks);
    }
}
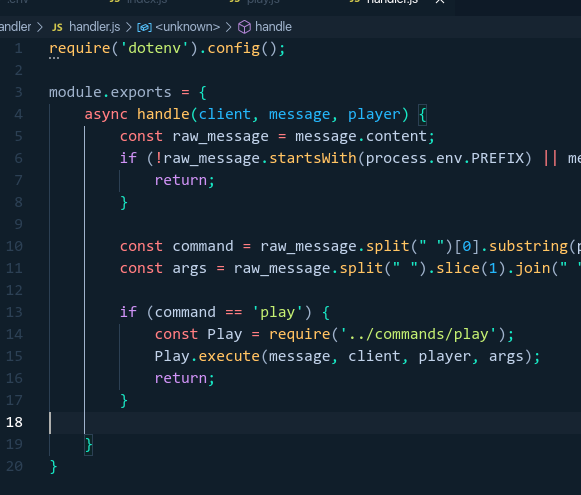
Chúng ta quay lại file handler.js để kết nối play.js. Các bạn thêm một hàm xử lý nếu tên command người dùng nhập là “play”:
1
2
3
4
5
if (command == 'play') {
    const Play = require('../commands/play');
    Play.execute(message, client, player, args);
    return;
}
Có vẻ ổn rồi đó. Các bạn hãy chạy file index.js và vào server test thử nhé:
| Rất rõ và mượt ヽ | ・ω・ | ゞ |
pause.js
Sau khi đã lập trình tính năng chơi nhạc, chúng ta cần chức năng tạm dừng. Các bạn hãy tạo một file có tên pause.js trong thư mục commands nha:
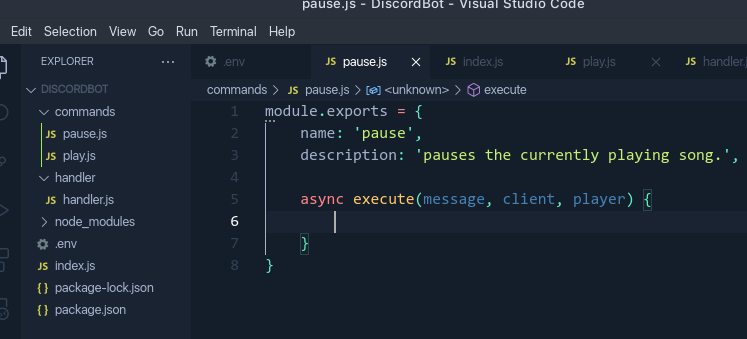
Chúng ta cũng sẽ cần thông tin về server và tác giả tin nhắn, và kiểm tra xem người đó có ở trong kênh voice không:
1
2
3
4
5
6
7
8
9
10
11
12
13
14
module.exports = {
    name: 'pause',
    description: 'pauses the currently playing song.',

    async execute(message, client, player) {
        const guild = await client.guilds.fetch(message.guildId);
        const author = await guild.members.fetch(message.author.id);

        if (author.voice.channelId == null) {
            message.channel.send('you are not in a voice channel.');
            return;
        }
    }
}
Tiếp đó chúng ta lấy thông tin về queue nhạc hiện tại:
1
const queue = player.getQueue(message.guildId);
Nếu không có bài nào đang được chơi, chúng ta cho Bot thông báo:
1
2
3
4
5
6
if (!queue || !queue.playing) {
    return await message.channel.send({
        content: ':x: | there is no music playing in this server.',
        ephemeral: true
    });
}
Còn nếu có, chúng ta sử dụng hàm setPaused() để dừng:
1
2
3
4
5
6
if (queue) {
    let y = queue.setPaused({ paused: true });
    return await message.channel.send({
        content: y ? `⏸ | paused.` : `:x: | failed to pause`,
    });
}
Đơn giản vậy thôi!
1
2
3
4
5
6
7
8
9
10
11
12
13
14
15
16
17
18
19
20
21
22
23
24
25
26
27
28
29
30
module.exports = {
    name: 'pause',
    description: 'pauses the currently playing song.',

    async execute(message, client, player) {
        const guild = await client.guilds.fetch(message.guildId);
        const author = await guild.members.fetch(message.author.id);

        if (author.voice.channelId == null) {
            message.channel.send('you are not in a voice channel.');
            return;
        }

        const queue = player.getQueue(message.guildId);

        if (!queue || !queue.playing) {
            return await message.channel.send({
                content: ':x: | there is no music playing in this server.',
                ephemeral: true
            });
        }

        if (queue) {
            let y = queue.setPaused({ paused: true });
            return await message.channel.send({
                content: y ? `⏸ | paused.` : `:x: | failed to pause`,
            });
        }
    }
}
Chúng ta quay lại file handler.js và kết nối file này nhé:
1
2
3
4
5
if (command = "pause") {
    const Pause = require('../commands/pause');
    Pause.execute(message, client, player);
    return;
}
resume.js
Đi kèm với chức năng tạm dừng nhạc, chúng ta cũng cần có chức năng tiếp tục phải không? Các bạn hãy tạo thêm file resume.js vào thư mục commands nha. Code của file này sẽ giống hệt với file pause.js, chỉ khác hàm setPaused() chúng ta truyền vào giá trị false:
1
let y = queue.setPaused(false);
1
2
3
4
5
6
7
8
9
10
11
12
13
14
15
16
17
18
19
20
21
22
23
24
25
26
27
28
29
30
module.exports = {
    name: 'resume',
    description: 'resumes the currently paused song.',

    async execute(message, client, player) {
        const guild = await client.guilds.fetch(message.guildId);
        const author = await guild.members.fetch(message.author.id);

        if (author.voice.channelId == null) {
            message.channel.send('you are not in a voice channel.');
            return;
        }

        const queue = player.getQueue(message.guildId);

        if (!queue || !queue.playing) {
            return await message.channel.send({
                content: ':x: | there is no music playing in this server.',
                ephemeral: true
            });
        }

        if (queue) {
            let y = queue.setPaused(false);
            return await message.channel.send(
                y ? '▶ | resumed.' : ':x: | failed to resume.'
            );
        }
    }
}
Các bạn nhớ kết nối file này vào handler.js nha:
1
2
3
4
5
if (command == 'resume') {
    const Resume = require('../commands/resume');
    Resume.execute(message, client, player);
    return;
}
skip.js
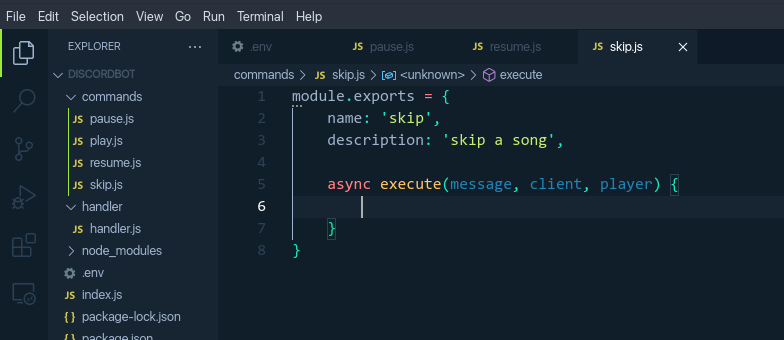
Chức năng bỏ qua bài nhạc hiện tại là không thể thiếu với một ứng dụng chơi nhạc. Các bạn hãy tạo file với tên skip.js trong folder commands:
Tiếp theo chúng ta sẽ lấy thông tin về queue hiện tại:
1
2
3
4
5
6
7
8
const queue = player.getQueue(message.guildId);

if (!queue) {
    return await message.channel.send({
        content: ':x: | no music is playing in this server',
        ephemeral: true,
    });
}
Chúng ta sử dụng hàm skip() để bỏ qua bài nhạc, sau đó thông báo vào server:
1
2
3
4
5
6
7
const currentTrack = queue.nowPlaying().title;
const success = queue.skip();
return await message.channel.send({
    content: success
        ? `⏭ | skipped **${currentTrack}**`
        : `:x: | failed to skip track`
});
1
2
3
4
5
6
7
8
9
10
11
12
13
14
15
16
17
18
19
20
21
22
23
module.exports = {
    name: 'skip',
    description: 'skip a song.',

    async execute(message, client, player) {
        const queue = player.getQueue(message.guildId);

        if (!queue) {
            return await message.channel.send({
                content: ':x: | no music is playing in this server',
                ephemeral: true,
            });
        }

        const currentTrack = queue.nowPlaying().title;
        const success = queue.skip();
        return await message.channel.send({
            content: success
                ? `⏭ | skipped **${currentTrack}**`
                : `:x: | failed to skip track`
        });
    }
}
Cuối cùng thì kết nối file này vào handler.js:
1
2
3
4
5
if (command == 'skip') {
    const Skip = require('../commands/skip');
    Skip.execute(message, client, player);
    return;
}
back.js
Chúng ta sẽ lập trình chức năng quay lại về bài nhạc trước đó. Các bạn hãy tạo file back.js trong folder commands, sau đó lấy thông tin về queue đang chạy:
1
2
3
4
5
6
7
8
9
10
11
12
13
14
15
16
17
const { MessageEmbed } = require('discord.js');

module.exports = {
    name: 'back',
    description: 'plays the previous track.',

    async execute(message, client, player) {
        const queue = player.getQueue(message.guildId);

        if (!queue) {
            return await message.channel.send({
                content: ':x: | no music is playing in this server',
                ephemeral: true,
            });
        }
    }
}
Sau đó chúng ta đơn giản chỉ cần sử dụng hàm back() để quay lại bài trước, sau đó thông báo lên vào kênh chat:
1
2
3
4
5
6
7
8
9
10
11
12
if (queue) {
    queue.back();
    const currentTrack = queue.nowPlaying();

    const playEmbed = new MessageEmbed()
        .setColor(`RANDOM`)
        .setTitle(`🎶 | now playing`)
        .setDescription(`[${currentTrack.title}](${currentTrack.url})`)
        .setThumbnail(currentTrack.thumbnail);

    return await message.channel.send({ embeds: playEmbed });
}
1
2
3
4
5
6
7
8
9
10
11
12
13
14
15
16
17
18
19
20
21
22
23
24
25
26
27
28
29
30
31
const { MessageEmbed } = require('discord.js');

module.exports = {
    name: 'back',
    description: 'plays the previous track.',

    // fuk
    async execute(message, client, player) {
        const queue = player.getQueue(message.guildId);

        if (!queue) {
            return await message.channel.send({
                content: ':x: | no music is playing in this server',
                ephemeral: true,
            });
        }

        if (queue) {
            queue.back();
            const currentTrack = queue.nowPlaying();

            const playEmbed = new MessageEmbed()
                .setColor(`RANDOM`)
                .setTitle(`🎶 | now playing`)
                .setDescription(`[${currentTrack.title}](${currentTrack.url})`)
                .setThumbnail(currentTrack.thumbnail);

            return await message.channel.send({ embeds: playEmbed });
        }
    }
}
Sau đó quay lại file handler.js và kết nối file này:
1
2
3
4
5
if (command == 'back') {
    const Back = require('../commands/back');
    Back.execute(message, client, player);
    return;
}
stop.js
Lệnh này có chức năng dừng hẳn chơi nhạc và xóa danh sách các bài nhạc đã đăng ký. Nhờ sự tiện lợi của module discord-player, chúng ta có thể đơn giản làm việc này với hàm destroy().
1
2
3
4
5
6
7
8
9
10
11
12
13
14
15
16
17
18
19
module.exports = {
    name: 'stop',
    description: 'stop your music and destroy your queue.',

    async execute(message, client, player) {
        const queue = player.getQueue(message.guildId);

        if (!queue || !queue.playing) {
            return await message.channel.send({
                content: ':x: | no music is being played.',
            });
        }

        queue.destroy();
        return await message.channel.send({
            content: '🛑 | successfully stopped music.',
        });
    }
}
Hãy nhớ kết nối với file handler.js nha:
1
2
3
4
5
if (command == 'stop') {
    const Stop = require('../commands/stop');
    Stop.execute(message, client, player);
    return;
}
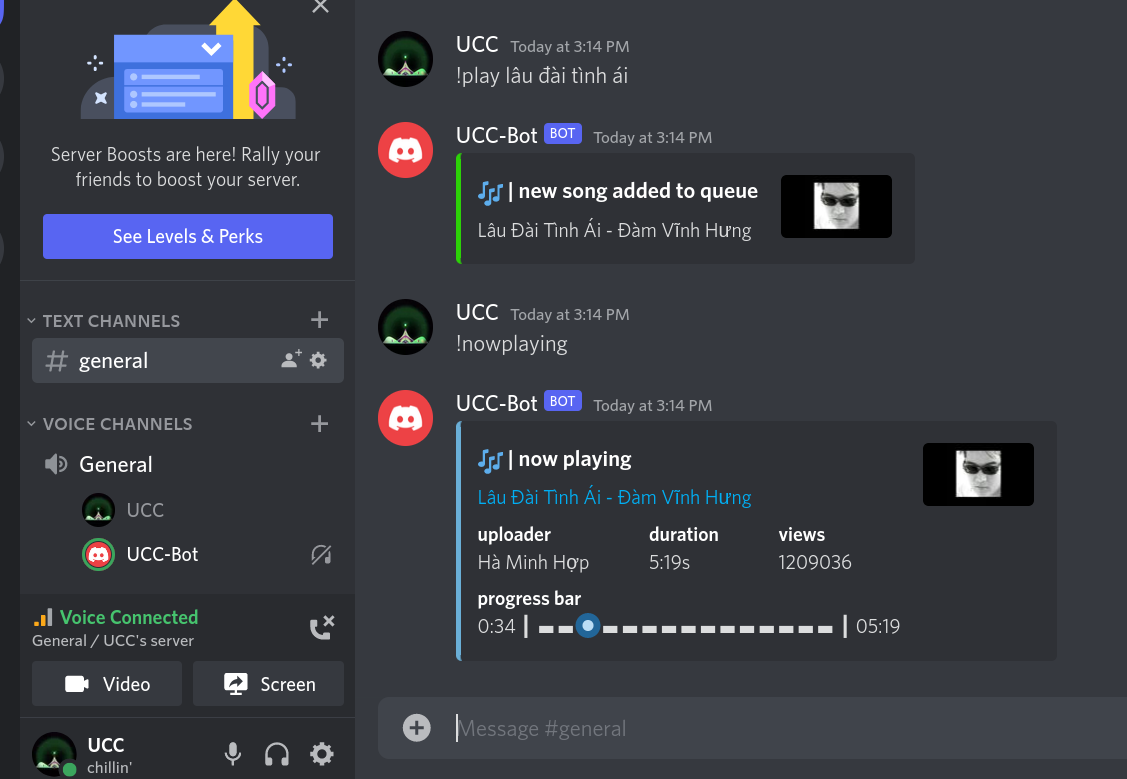
nowplaying.js
Tính năng lấy thông tin của bài nhạc hiện tại đang chơi cũng rất hữu ích. Để lập trình được tính năng này, các bạn hãy tạo file nowplaying.js trong thư mục commands và lấy thông tin về queue hiện tại:
1
2
3
4
5
6
7
8
9
10
11
12
13
14
15
16
const { MessageEmbed } = require('discord.js');

module.exports = {
    name: 'nowplaying',
    description: 'displays currently playing song.',

    async execute(message, client, player) {
        const queue = player.getQueue(message.guildId);

        if (!queue) {
            return await message.channel.send({
                content: ':x: | no music is playing in this server',
                ephemeral: true,
            });
        }
    }
Sau đó chúng ta lấy thông tin về bài nhạc đang được chạy bằng hàm nowPlaying():
1
const currentTrack = queue.nowPlaying();
Sau đó chúng ta cho Bot thông báo lên server bằng một Embed Message thật đẹp:
1
2
3
4
5
6
7
8
9
10
11
12
13
14
15
16
17
18
19
20
21
22
23
24
25
26
27
28
29
30
31
32
33
const npEmbed = new MessageEmbed()
    .setColor(`RANDOM`)
    .setTitle(`🎶 | now playing`)
    .setDescription(`[${currentTrack.title}](${currentTrack.url})`)
    .setThumbnail(currentTrack.thumbnail)
    .addFields(
        {
            name: 'uploader',
            value: currentTrack.author,
            inline: true,
        },
        {
            name: 'duration',
            value: currentTrack.duration + "s",
            inline: true,
        },
        /*{
            name: 'requested by',
            value: currentTrack.requestedBy.username,
            inline: true,
        },*/
        {
            name: 'views',
            value: currentTrack.views.toString(),
            inline: true,
        },
        {
            name: 'progress bar',
            value: queue.createProgressBar({ timecodes: true }),
        },
    );

return await message.channel.send({ embeds: [npEmbed] });
Hãy nhớ kết nối file này với handler.js nha:
1
2
3
4
5
if (command == 'nowplaying') {
    const NowPlaying = require('../commands/nowplaying');
    NowPlaying.execute(message, client, player);
    return;
}
queue.js
Chức năng cuối cùng và cũng rất hữu dụng, đó là thông báo về những bài nhạc đang chờ trong queue. Đầu tiên, chúng ta tạo file queue.js trong thư mục commands, sau đó lấy thông tin về queue hiện tại:
1
2
3
4
5
6
7
8
9
10
11
12
13
14
15
16
17
const { MessageEmbed } = require('discord.js');

module.exports = {
    name: 'queue',
    description: 'displays current queue',

    async execute(message, client, player) {
        const queue = player.getQueue(message.guildId);

        if (!queue) {
            return await message.channel.send({
                content: ':x: | no music is playing in this server',
                ephemeral: true,
            });
        }
		}
}
Sau đó chúng ta lấy danh sách các bài trong queue này:
1
const currentTrack = queue.current;
Chúng ta lấy 10 bài đầu tiên trong queue để hiển thị, sau đó thông báo lên server bằng Embed Message:
1
2
3
4
5
6
7
8
9
10
11
12
13
14
15
16
17
18
19
20
21
22
23
24
const tracks = queue.tracks.slice(0, 10).map((m, i) => {
    return `${i + 1}. **${m.title}** ([link](${m.url}))`;
});

const progressBar = queue.createProgressBar({ timecodes: true });

const queueEmbed = new MessageEmbed()
    .setColor(`RANDOM`)
    .setTitle('🎶 | current queue')
    .setDescription(
        `**__now playing__ - [${currentTrack.title}](${currentTrack.url})**\n
        ${progressBar}\n
        ${tracks.join('\n')}${
            queue.tracks.length > tracks.length
                ? `\n...${
                    queue.tracks.length - tracks.length === 1
                        ? `{queue.tracks.length - tracks.length} more track`
                        : `{queue.tracks.length - tracks.length} more tracks`
                    }`
                : ""
        }`
    );

return await message.channel.send({ embeds: [queueEmbed] });

Tổng kết
Nếu các bạn theo mình đến đây, chúc mừng bạn đã tự tay lập trình ra một con bot siêu vjp. Trên đây, UCC đã hướng dẫn 8 chức năng cơ bản nhất của một con Bot Discord chơi nhạc. Các bạn hoàn toàn có thể thỏa thích sáng tạo thêm những tính năng khác cho Bot, thậm chí có thể làm game với nó. Nếu có bất kỳ thắc mắc nào, hãy đừng ngần ngại mà nhắn tin cho chúng tớ tại fanpage nhé!
Cuối cùng, chúng mình gửi lại các bạn toàn bộ mã nguồn của con bot tại đây.